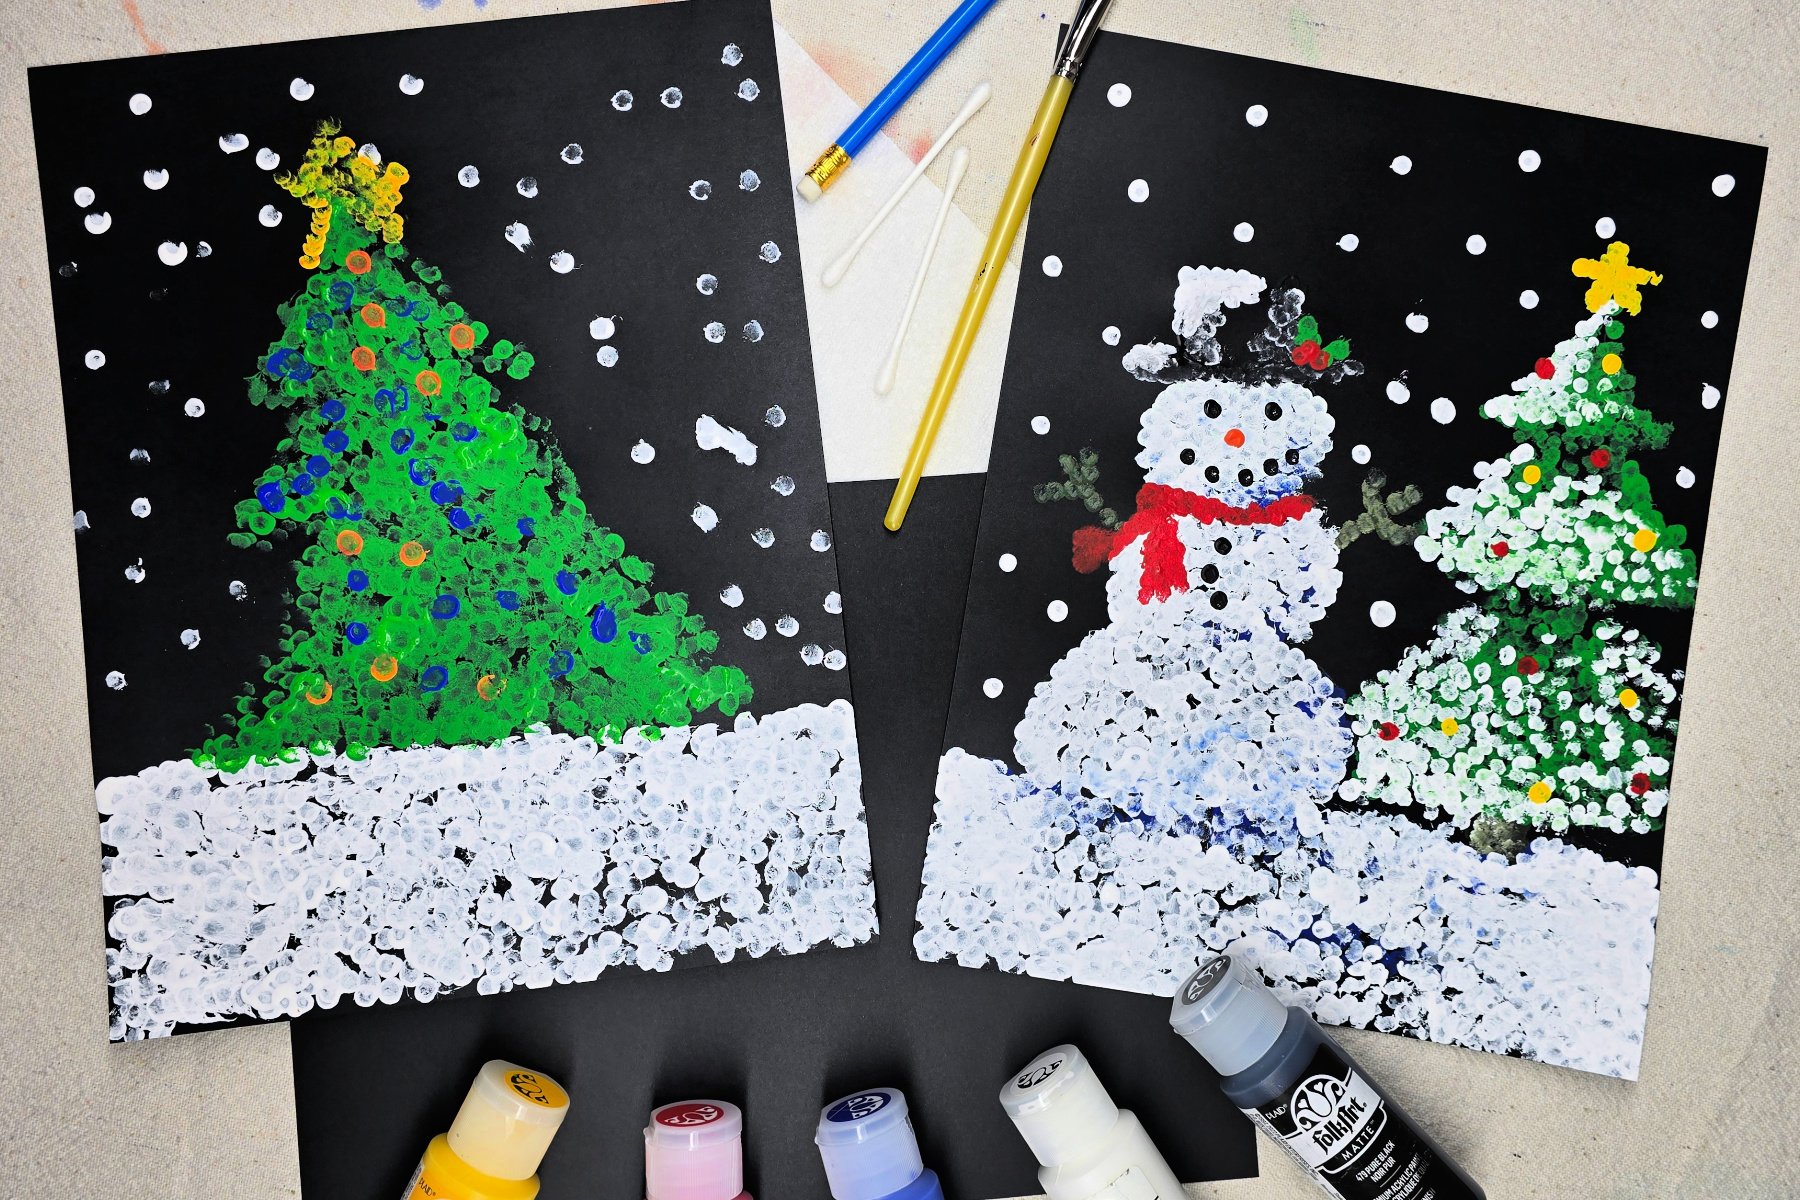
School-aged kids will learn about painting using the pointillism technique in this easy project. This lesson can easily be completed at home or in the classroom.
What is Pointillism?
Using the pointillism technique means that the artist simply paints by using dots. The painted dots can be of any size, color, and medium. Artists can use many methods to create their dots, but I find the easiest way is to use a circular object and stamp the paint onto the paper.
Related: Use oil pastels to create a lovely winter silhouette.
Supplies Needed to Make a Snow Scene Pointillism Art Project
- Black Cardstock
- Cotton Swabs, Pencil Erasers, Paintbrushes, etc. – for stamping dots
- White Colored Pencil
- Acrylic Paint
- Paper Towels
- Paint Palette
Directions to Make Snow Scene Pointillism
Step 1
First, use a white colored pencil to sketch a basic snow scene design.
Step 2
Begin adding paint to your snow scene. Be mindful of space when painting by first painting the objects in the back. This will help the items appear layered and add space and dimension to your art.
Step 3
The black cardstock will offer it’s own dark shadows, so don’t be afraid to use bold colors for more interesting shadows and highlights. Layer more dots and paint where you want the colors to be most intense.
Step 4
Cotton swabs can easily become frayed with this technique. If using, I recommend that you have plenty on hand and change swabs for each color. Discard swabs as they fray and become unusable.
Tip: To avoid this problem, use the eraser end of a pencil or the handle end of paintbrush to easily create dots. Clean between each color.
Step 5
Kids can practice blending paints on the page by adding dots onto portions of their artwork that still has wet paint.
Step 6
Finally, add the finishing touches and details to the painting.
Finished Snow Scene Pointillism Art Projects
I love how easy and fun these projects were! Since these projects are made on paper, they can be easily framed, clipped, or displayed in your preferred style along with your holiday decorations.
Our Experience Making this Snow Scene Pointillism Art Project
We enjoyed making this quick and easy project. I always love how bright, bold colors look against the black cardstock. Depending on the medium, pointillism can be a very time consuming process. I believe using this stamp-painting technique is a wonderful way to introduce kids to the technique without overwhelming their patience.
Prep Time
5 minutes
Active Time
20 minutes
Total Time
25 minutes
Difficulty
Medium
Estimated Cost
$1
Tools
- Cotton Swabs, Pencil Erasers, Paintbrushes, etc. – for stamping dots
- White Colored Pencil
- Acrylic Paint
- Paper Towels
- Paint Palette
Instructions
- Use a white colored pencil to sketch a basic snow scene design.
- Add paint to your snow scene. Be mindful of space when painting by first painting the objects in the back. This will help the items appear layered and add space and dimension to your art.
- Don’t be afraid to use bold colors for more interesting shadows and highlights. Layer more dots and paint where you want the colors to be most intense.
- Cotton swabs can easily become frayed with this technique. If using, I recommend that you have plenty on hand and change swabs for each color. Discard swabs as they fray and become unusable. Tip: To avoid this problem, use the eraser end of a pencil or the handle end of paintbrush to easily create dots. Clean between each color.
- Practice blending paints on the page by adding dots onto portions of the artwork that still has wet paint.
- Add the finishing touches and details to the painting.
Notes
Snow Scene Pointillism Art Variations
- Experiment with various sized items to stamp your circles.
- Alter theme to fit any season or holiday.
- Practice pointillism by using other mediums such as oil or chalk pastels.
Snow Scene Pointillism Art Variations
- Experiment with various sized items to stamp your circles.
- Alter theme to fit any season or holiday.
- Practice pointillism by using other mediums such as oil or chalk pastels.
Other Fun winter Art Projects from Kids Activities Blog
Did your kids enjoy painting with this pointillism technique? What elements did they add to their snow scene?

