School-aged kids will create fun complementary colored shamrocks in this project. We’ve included a free printable to make this lesson easy for home or classroom use.
Complementary Colors
Complementary colors are easily found by locating opposite colors on a color wheel. Artists will use complementary colors to achieve more vibrant results between objects. Kids can generally point out famous complementary color combinations such as: Christmas colors that tend to be red and green, sports teams using orange and blue, yellow and purple, and so on.
Review Complementary Colors with our Free Printable.
Supplies Needed to Make This Shamrock and complementary colors Art Project
- Shamrock Outlines printed on Cardstock – Free Download Below
- Black Crayon
- Ruler
- Watercolor Paints – 2 Complementary Colors
- Paintbrushes
- Paper Towels
- Water
Download the Shamrock Printable Here
Save time with our free shamrock designs. Print these images on cardstock to help kids easily begin their projects.
Directions to Make this Shamrocks and Complementary colors Art project
Step 1
Use the ruler and black crayon to draw both vertical and horizontal grid lines across the entire page. Tip: Firmly press down with the black crayon to create a solid line for the wax resist technique.
Also, firmly trace shamrock design with crayon to apply the wax resist effect to those lines as well.
Step 2
Next, use one of the colors of watercolor paint to fill in every other background box, or those outside the shamrock design.
Step 3
Once every other box is painted, add water to the watercolor paint puddle. This will create a lighter value of that color. Then, use the lighter value to paint the remaining background spaces surrounding the shamrock.
Step 4
Next, use the second (or complementary) color of watercolor paint to begin filling the shamrock design. Again, start by painting every other space with the unaltered value of that color.
Step 5
Once every other box is painted, add water to the watercolor paint puddle to create a lighter value of that color. Then, use the lighter value to paint the remaining shamrock spaces.
Set project aside to dry.
Finished Shamrock and complementary colors Art Project
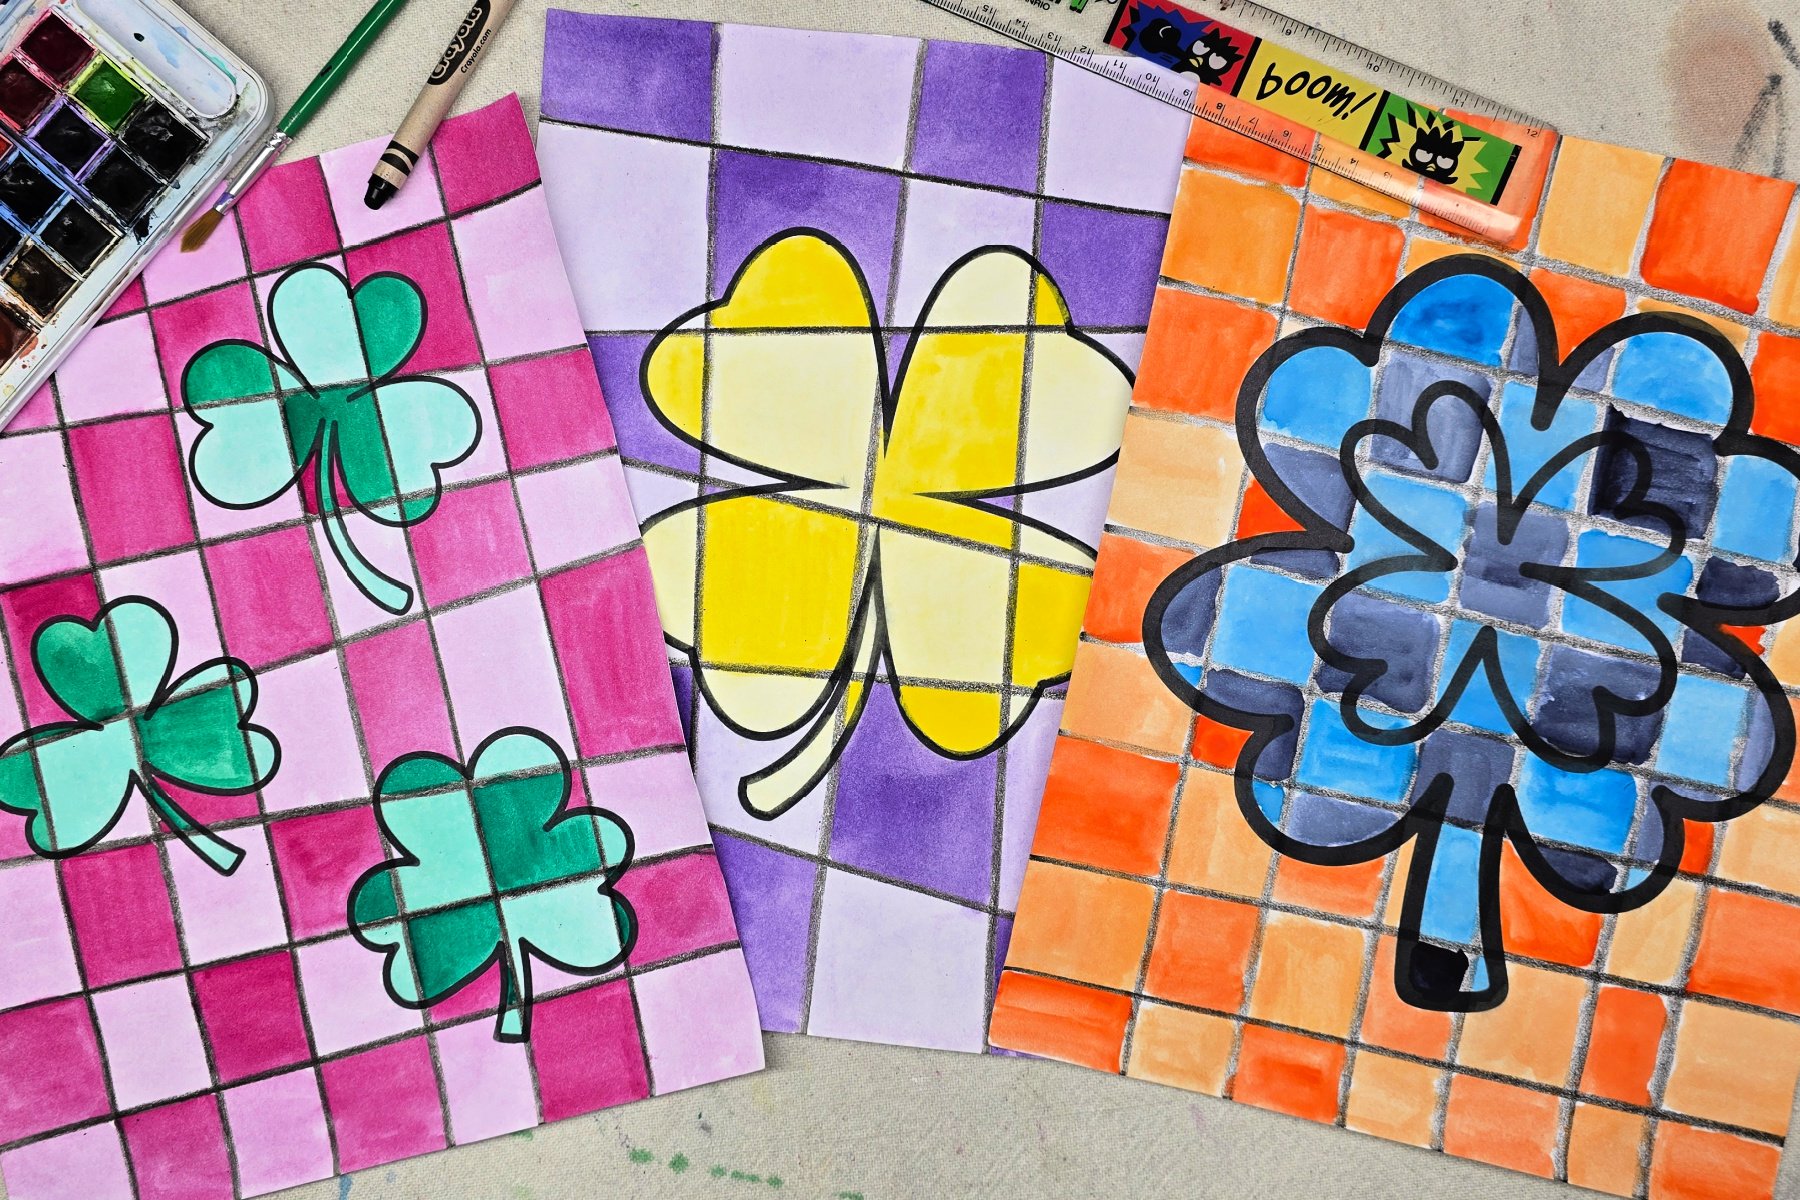
I love the bright colors on these shamrocks! Since these projects are made on paper, they are easily framed, clipped, or displayed in your preferred style with your seasonal decorations.
Our Experience Making this Shamrock Art Project
This project was a fun and easy way to introduce color theory with using complementary colors and values. I love that the color schemes are easy to create and the wax resist technique helps students create wall worthy art. This project also opens the door for kids to explore more color combinations and watercolor skills.
While creating this project, we were reminded that inkjet printer inks can bleed if over saturated. This was only an issue for us when it came to using the lighter yellow paints. Also, when painting on cardstock, the paper can become weak and tear if overworked. It’s best to get one solid coat of paint on the page and then move to the next block.
Prep Time
5 minutes
Active Time
15 minutes
Total Time
20 minutes
Difficulty
Medium
Estimated Cost
$1
Materials
- Shamrock Outlines printed on Cardstock – Free Download Below
Tools
- Black Crayon
- Ruler
- Watercolor Paints – 2 Complementary Colors
- Paintbrushes
- Paper Towels
- Water
Instructions
- Use the ruler and black crayon to draw both vertical and horizontal grid lines across the entire page. Tip: Firmly press down with the black crayon to create a solid line for the wax resist technique. Also, firmly trace shamrock design with crayon to apply the wax resist effect to those lines as well.
- Use one of the colors of watercolor paint to fill in every other background box, or those outside the shamrock design.
- Next, add water to the watercolor paint puddle to create a lighter value of that color. Then, use the lighter value to paint the remaining background spaces surrounding the shamrock.
- Use the second (or complementary) color of watercolor paint to begin filling the shamrock design. Again, start by painting every other space with the unaltered value of that color.
- Add water to the watercolor paint puddle to create a lighter value of color. Then, use the lighter value to paint the remaining shamrock spaces.
Set project aside to dry.
Notes
Shamrock Art Variations
- Have kids sketch their own shamrock designs instead of using the free printable pages.
- Complete project using analogous or warm and cool color combinations.
- Practice value by completing this project with other mediums such as crayons or acrylic paints.
- Adapt project to fit other seasons or holiday themes.
Other Fun St. Patrick’s Day Activities from Kids Activities Blog
Did your kids enjoy this Shamrock project? What complementary colors did they use?