School-aged kids practice mixed media skills in this fun and easy project inspired by Frankenstein’s Monster. These techniques can easily be used at home or in the classroom.
Mixed media art simply means that an artist used multiple mediums to create the finished piece. This is a fun style of art that encourages artists to explore new techniques, mediums, and styles. This is one of those projects where we pull out all of the supplies and kids are free to create and explore on their own.
Related: We love gathering up supplies to use in mixed media art that have fun textures!
The supply list is limitless! You decide what supplies to bring to the table. We’re sharing a list of a few suggestions:
- Magazines, Discarded Book Pages, Scrapbook Papers, etc. – For Background Collage
- Cardstock – For Base
- Scissors
- Glue Stick
- Pencils, Permanent Markers, Colored pencils, Crayons, etc. – to add sketches and color to the project
- Paints, Paintbrushes, Water, Sponges, Scrap Corrugated Cardboard, etc – To add more colors and layers
- Paper Towels
Step 1
Glue pieces of torn pages onto cardstock to begin creating a background.
Tip: Consider avoiding glossy pages on this step since they do not easily accept all art mediums.
Step 2
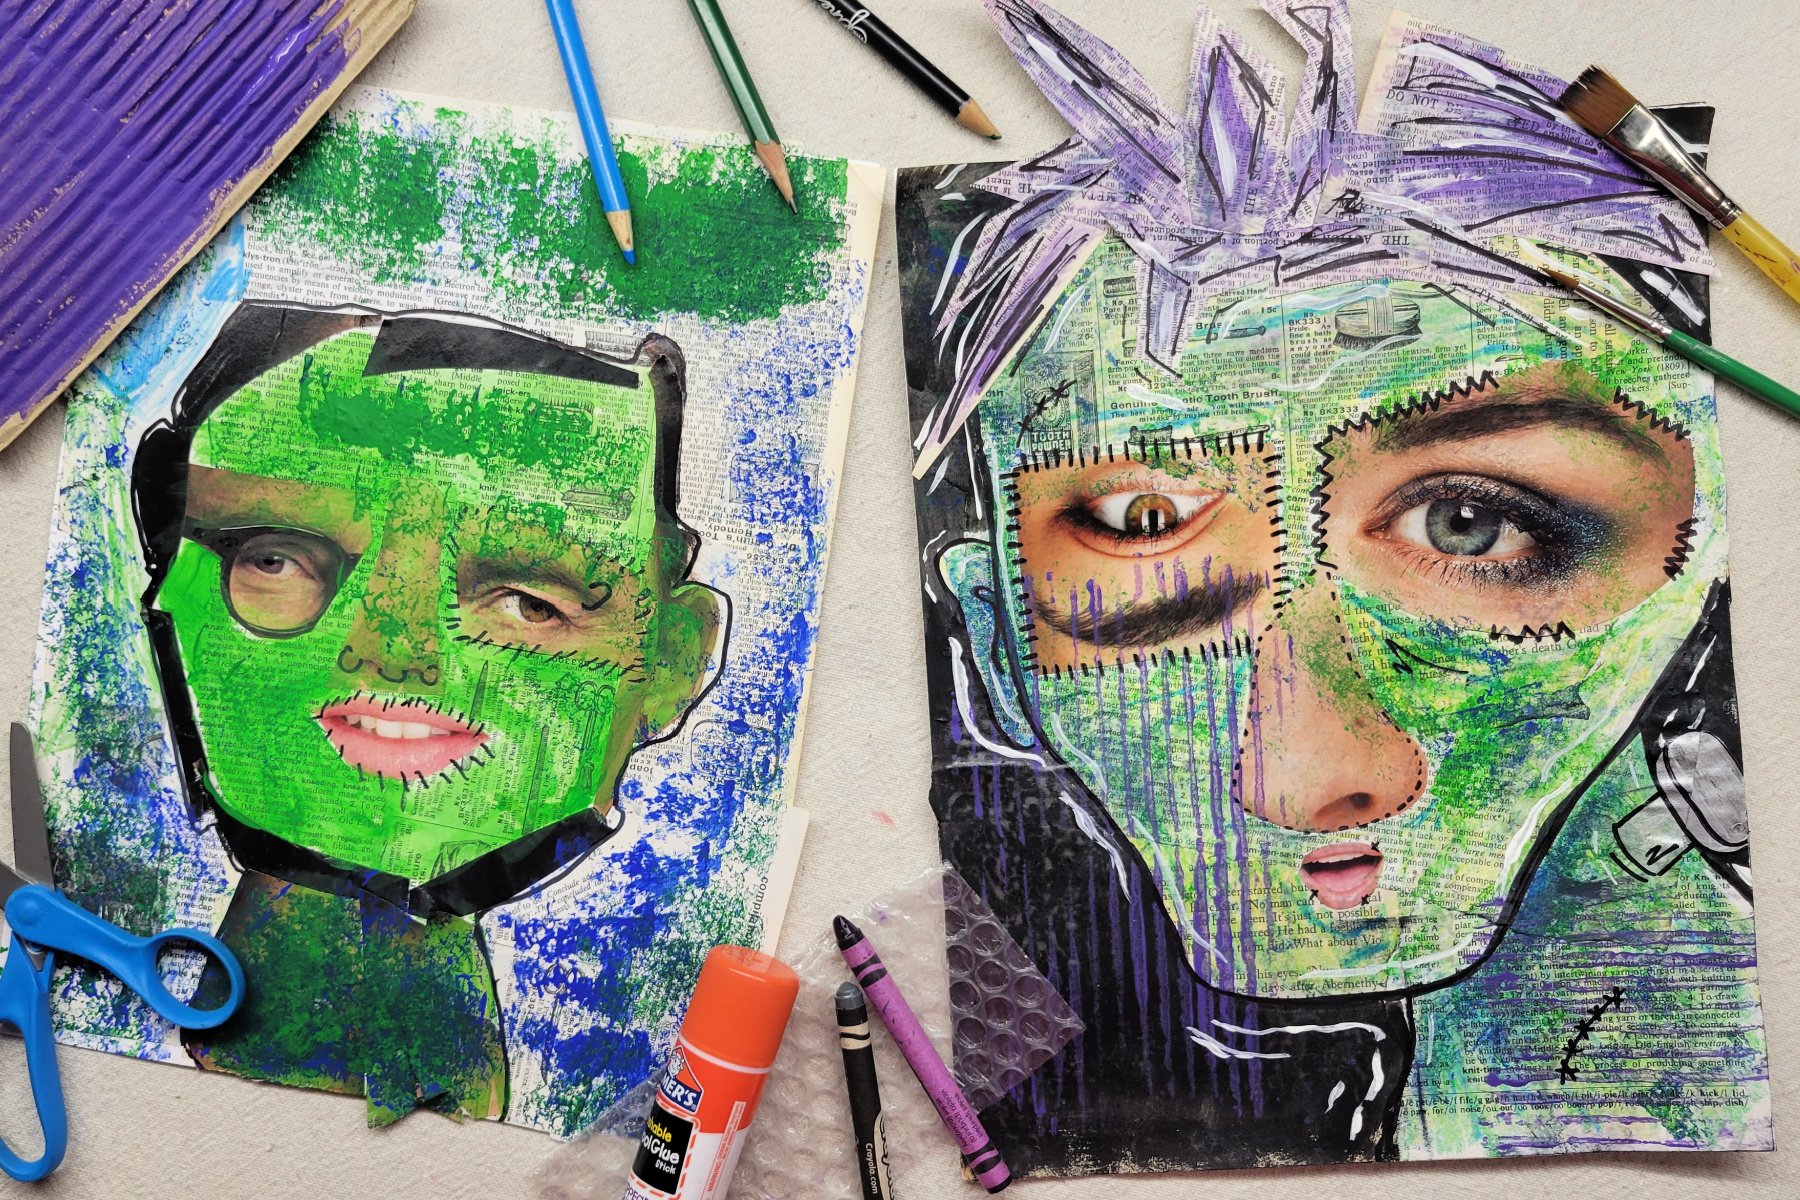
Next, glue clippings of facial features from magazines onto background to begin creating your monster.
Step 3
Then, use a permanent marker to draw an outline of the monster. This is also a good time to add any details (like stitches) to the face.
Step 4
Then, use dry mediums to begin adding color and details to the monster.
Step 5
Next, add paint and other mediums to your project.
Note: Saving wet mediums for last helps to speed up the process without having to wait between layers to add details.
Step 6
Continue layering paint and techniques to add more details. This is when we pulled out fun textured objects to use as stamps for paint, glued more paper on as hair, and added more lines and details using a paintbrush. The possibilities are endless!
I love how these funky monsters turned out! With the projects being made on paper, they can easily be framed, clipped, or displayed in your preferred style.
We had so much fun making these monsters. I love giving kids a chance to explore art with projects that have no limitations on creativity. It is especially great when those projects demonstrate how we can use “trash” to make art.
Prep Time
5 minutes
Active Time
20 minutes
Total Time
25 minutes
Difficulty
Medium
Estimated Cost
$1
Materials
- Magazines, Discarded Book Pages, Scrapbook Papers, etc. – For Background Collage
- Cardstock – For Base
Tools
- Scissors
- Glue Stick
- Pencils, Permanent Markers, Colored pencils, Crayons, etc. – to add sketches and color to the project
- Paints, Paintbrushes, Water, Sponges, Scrap Corrugated Cardboard, etc – To add more colors and layers
- Paper Towels
Instructions
- Glue pieces of torn pages onto cardstock to begin creating a background.
Tip: Consider avoiding glossy pages on this step since they do not easily accept all art mediums. - Glue clippings of facial features from magazines onto background to begin creating the monster.
- Use a permanent marker to draw an outline of the monster. This is also a good time to add any details (like stitches) to the face.
- Use dry mediums to begin adding color and details to the monster.
- Add paint and other mediums to your project.
- Continue layering paint and techniques to add more details. This is when we pulled out fun textured objects to use as stamps for paint, glued more paper on as hair, and added more lines and details using a paintbrush. The possibilities are endless!
Notes
Mixed media Monster Art Variations
- Limit mediums to dry materials to cut down on time and mess.
- Kids can completely draw their monsters without using magazine images.
- Alter the lesson plan to create a space monster, sea creature, etc!
- Limit mediums to dry materials to cut down on time and mess.
- Kids can completely draw their monsters without using magazine images.
- Alter the lesson plan to create a space monster, sea creature, etc!
Other Fun monster Art Projects from Kids Activities Blog
Did your kids have fun exploring various art mediums with this project? What kind of monster did they create?