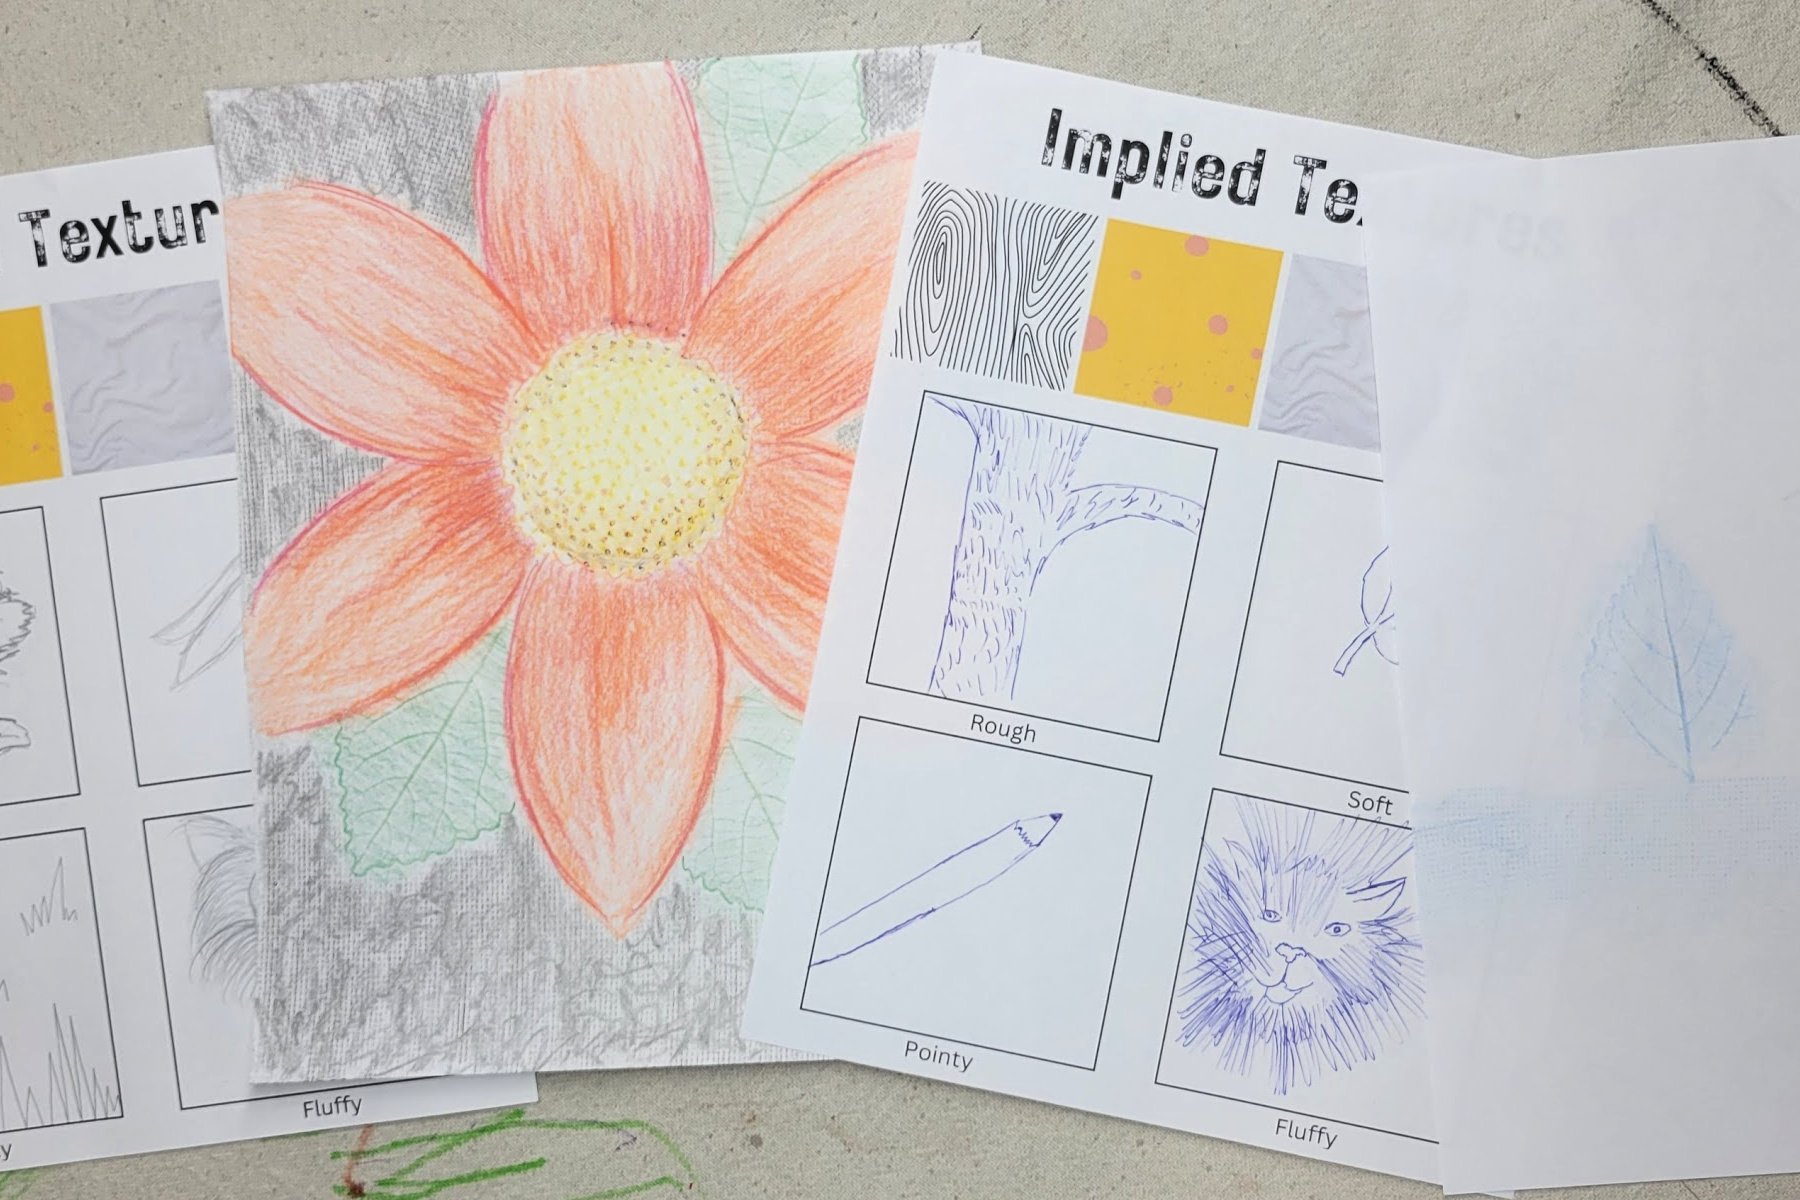
Kids learn how artists use implied textures within their artwork. We’ve included a free printable to make this project easier for both home and classroom use.
Implied Textures in Art
Artists use implied textures to give visual clues for the viewer to know how an item physically feels. This may be a rough rock, soft fabric, or sticky mud. By learning how to relay these textures within art, kids can apply texture to any future project.
Related: Use texture with coloring pages.
Supplies Needed to Make This Implied Textures Art Project
- Implied Textures Printable (Download Below) – printed on copy paper
- Copy Paper – a few pages per student
- Pencils, colored pencils, crayons
- Random textured items – consider taking this activity outdoors!
Download the Implied Textures Printable Here
This printable gives kids a chance to think about how they would use implied textures within a drawing. The printable includes both a page with texture prompts (rough, smooth, pointy, fluffy), and one without. Use either page to encourage kids to think about various textures they are familiar with.
Directions to Make Implied Textures Art
Step 1
Kids look at the images across the top of the Implied Textures printable. Discuss how each top square would feel if they were to really touch that object. The rough grain of the wood, the squishy, soft sponge, the smooth fabric, gritty dirt, etc.
Step 2
Kids then use a drawing medium to fill in the lower boxes to imply the various textures: rough, soft, pointy, fluffy.
Encourage kids to draw the texture, not just an item that would feel that way. For example, a kid may draw a cat in the “fluffy” box. Encourage the child to actually draw the fur to further show how fluffy the cat is. Long haired cats tend to be softer and fluffier, therefore artists may to use longer lines to relay this texture to the viewer.
Step 3
Using a blank sheet of paper. Have kids create rubbing transfers of various textures around the room (or outdoors). Remind kids to use the sides of their drawing tools to create the best transfer. Textures are all around us. Have kids explore with rubbings of leaves, bricks, tile grout, concrete, coins, stencils, etc.
Step 4
On a clean piece of paper, kids use both drawing and texture rubbings to create a picture.
Finished Implied Textures Art Project
I love how these projects turn out and the various ways kids use texture. They also have fun exploring new textures and ideas for their projects. The possibilities are truly endless!
Our Experience Making this Implied Texture Art Project
Usually kids have created a leaf rubbing by the time kids get to my class. This project opens their minds to seeing other textures around them. It also gives kids a chance to explore how to use various implied textures within art.
Prep Time
5 minutes
Active Time
30 minutes
Total Time
35 minutes
Difficulty
easy
Estimated Cost
$1
Materials
- Implied Textures Printable (Download Below) – printed on copy paper
- Copy Paper – a few pages per student
Tools
- Pencils, colored pencils, crayons
- Random textured items – consider taking this activity outdoors!
Instructions
- Use the images across the top of the Implied Textures printable to discuss how each top square would feel if kids were to really touch that object.
- Kids use a drawing medium to fill in the lower boxes to imply the various textures: rough, soft, pointy, fluffy.
- Using a blank sheet of paper. Kids create rubbing transfers of various textures around the room (or outdoors). Use the sides of drawing tools to create the best transfer.
- On a clean piece of paper, kids use both drawing and rubbings of textures to create a picture.
Other fun Texture Art Projects from Kids Activities Blog
What textures did your kids find for this activity? Which texture rubbing was their favorite?

