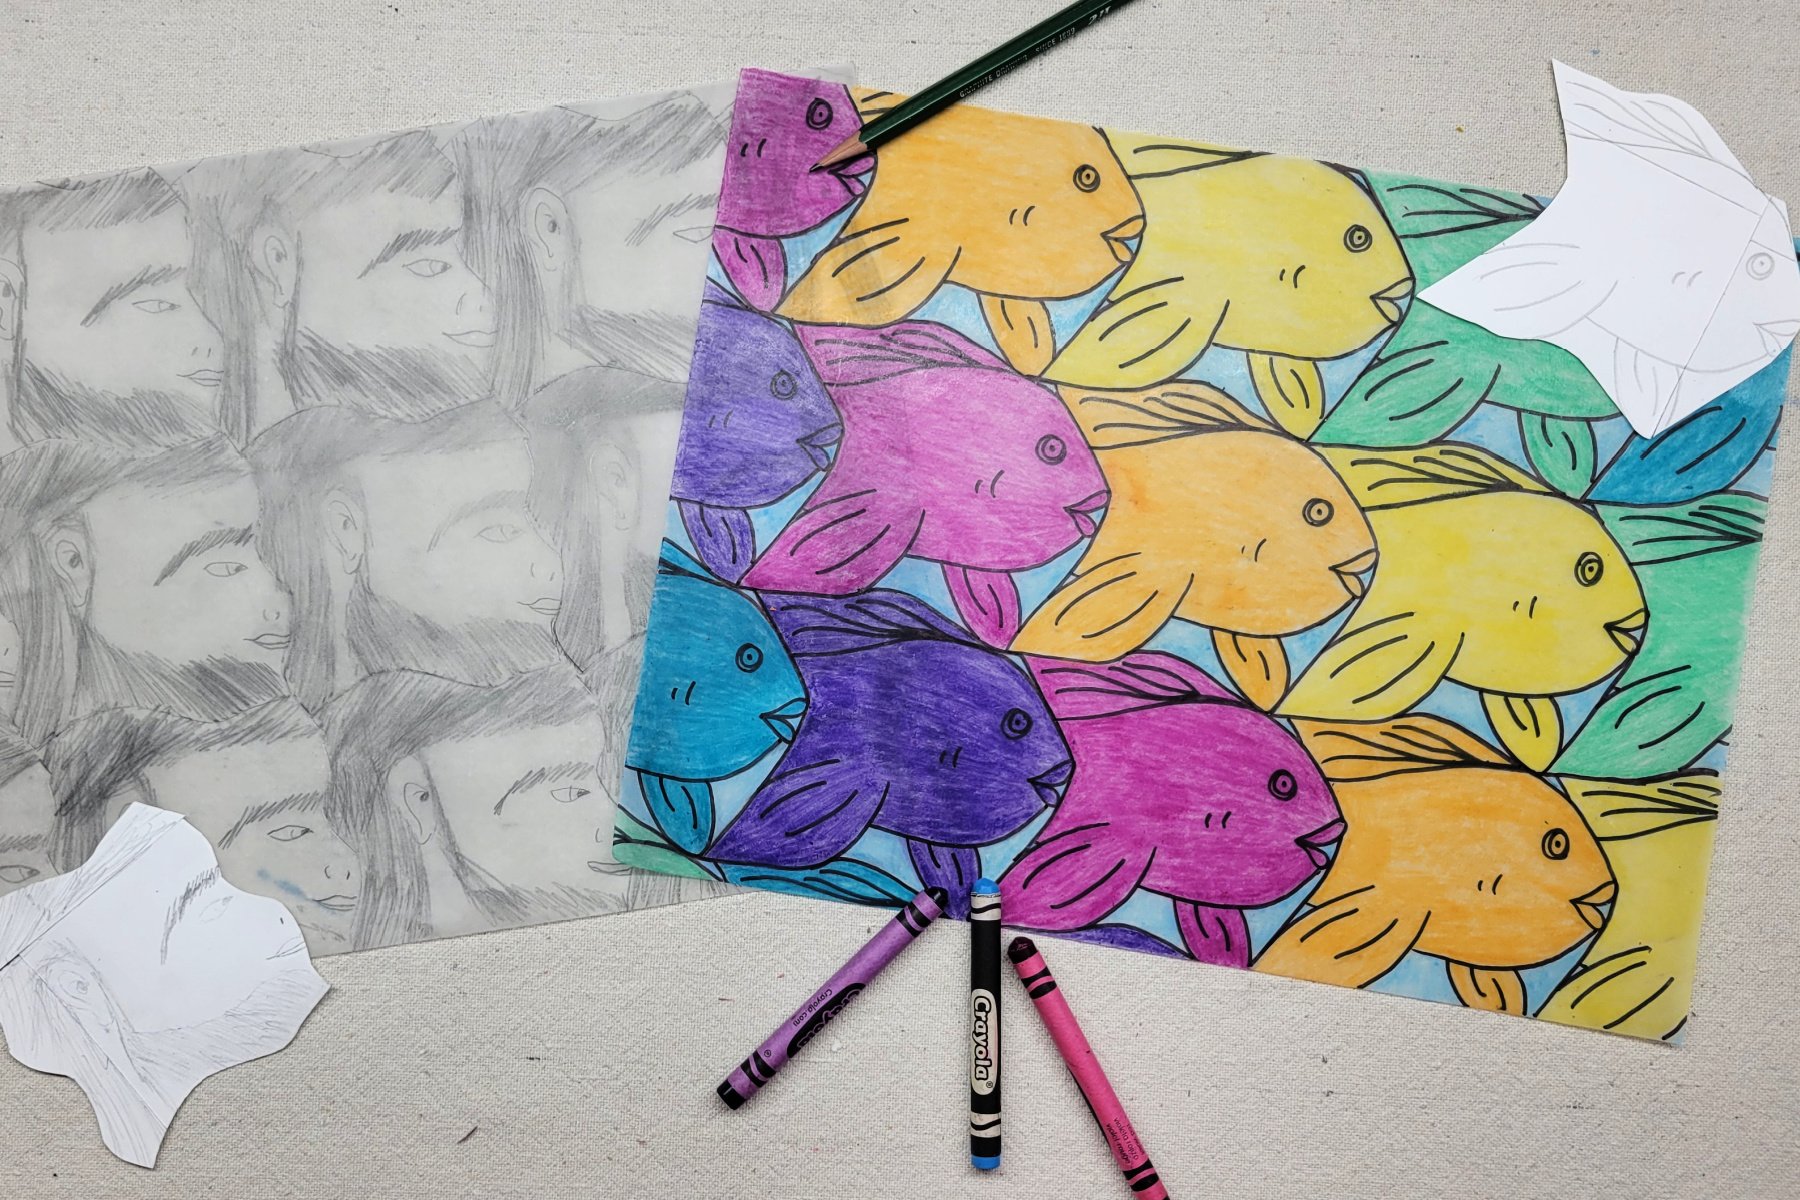
Tessellations are a fun way for school aged kids to practice creativity, drawing and cutting skills while focusing on patterns. This project requires few supplies making it perfect for the home or classroom.
What is a Tessellation?
A tessellation is when a geometric shape (or tile) repeats itself over and over again, covering a 2D or 3D surface without any gaps or overlaps.
My Modern Met
We will be creating a basic form of tessellations within this project, opening the door for kids to further explore this concept. By starting simple, we give kids a chance to express their creativity before getting overwhelmed by complex designs.
Related: Explore more patterns with our Mandala Art Project!
Supplies Needed to Make This Tessellation Art Project
- Cardstock “Tile” – Cut into a Square (We used 3 inch squares)
- Tracing Paper
- Pencil
- Tape
- Colored Medium of Choice – Crayons, Colored Pencils, Markers
- Permanent Marker
Directions to Make Tessellation Art
Step 1
Kids cut the top completely off the square “tile” by using a shaped line. The cut can be any shape but needs to cover the entire width of the tile.
Step 2
Without changing the direction of the cut shape, slide it to the bottom of the square. Tape across the full length of the seam. Then, rotate the tile to place an uncut flat edge at top.
Important: The design must line up directly from top to bottom. If cut lines do not line up then the kids’ patterns will not fit together correctly. I often remind kids of how we are basically making a puzzle piece so everything needs to line up perfectly to complete our patterned “puzzle” design.
Step 3
Next, kids cut a piece from the new “top” of the original square.
Step 4
Without changing the direction of the cut shape, slide it to the bottom of the original square. Tape at the seam, again keeping everything in line.
Step 5
Kids now look at the new tile shape, turning it in various directions, to see what it resembles. Using a pencil, kids sketch their design on the tile.
Step 6
Next, Center the tile under a piece of tracing paper. Trace along the outer edge and design of tile.
Step 7
Slide the tile in any direction and trace to add more tiles to the page. If the tile was cut correctly, all pieces should fit together like a puzzle or tiled floor.
Some tiles will “hang” off the page, but kids still need to draw in those designs. I remind students this is like we’re zoomed in on one portion of a puzzle or tiled floor. We just don’t see all of the design.
Step 8 (Optional)
Trace design using permanent marker, erase any unnecessary pencil lines, and color.
Finished Tessellation Art Project
I love how these projects turn out each year! It is so much fun to see how each child starts with the same basic tile shape but all of the finished projects look unique. Since these projects are made on paper, they are easily framed, clipped, or displayed in your preferred style.
Our Experience Making this Tessellation Art Project
This is one of those projects that I tend to repeat yearly because it gives kids a chance to express their creativity and uniqueness. Even if the kids have taken my class before, tessellations give a different finished result each time based on the child’s tile shape.
Prep Time
5 minutes
Active Time
45 minutes
Total Time
50 minutes
Difficulty
Medium
Estimated Cost
$1
Materials
- Cardstock “Tile” – Cut into a Square (We used 3 inch squares)
- Tracing Paper
Tools
- Pencil
- Tape
- Colored Medium of Choice – Crayons, Colored Pencils, Markers
- Permanent Marker
Instructions
- Kids cut the top completely off the square “tile” by using a shaped line.
- Without changing the direction of the cut shape, slide it to the bottom of the square. Tape across the full length of the seam. Rotate tile to place an uncut flat edge at top.
- Cut a shaped piece from the new “top” of the original square.
- Without changing the direction of the cut shape, slide it to the bottom of the original square. Tape at the seam.
- Sketch design on the tile.
- Center the tile under a piece of tracing paper. Trace along the outer edge and design of tile.
- Slide the tile in any direction and trace to add more tiles to the page. If the tile was cut correctly, all pieces should fit together like a puzzle or tiled floor.
- Optional: Trace design using permanent marker, erase any unnecessary pencil lines, and color.
Notes
Tessellation Art Variations
- Use transfer paper to transfer tile image onto another type of paper.
- Adjust size of tessellation tiles to allow different pattern sizes. I generally have younger kids create larger, less detailed, tiles.
- Use a light box or sunny window to trace tile design onto copy paper.
Other Fun Patterned Art Projects from Kids Activities Blog
Did your kids enjoy creating tessellations? What designs did they create?

